Dr. Brad Muller
Embry-Riddle Aeronautical University
Saving a GARP image that includes the information bar at the bottom takes a very specialized procedure that involves doing a screensave via the "Print Screen" key. Saving gif images out of GARP using the file>>save>>etc. procedure will not keep the information bar that includes the brightness or the "+" that you place at your brightness temperature location.
1. Reboot to linux and open a GARP window. Resize the GARP window manually to ultimately obtain images small enough to easily display the entire image on one printed page, however, not so small that you eliminate the brightness temperature info--you may have to experiment! It is essential that the information bar with brightness temperature at the bottom of the GARP window be visible in the image you ultimately print and hand in!
2. Click on the leftmost button (radar and satellite data).
3. For "Data Source" click on "ERAU."
4. For "Data Scale" click on "CONUS."
5. For "Product Types" click on "IR."
Note: You must use those exact data sources to get the U.S. data that have brightness temperatures. GOES-11 and GOES-12 are obsolete, and the "WEST-CONUS" and "EAST-CONUS" buttons only have brightness counts, but not temperature.
6.Pick a time then click on the "Display and Close" button.
7. Use a 'rubber band box" to zoom to the area of interest. This is done by left clicking and holding down at the upper left corner of your desired box then moving the mouse to size the box.
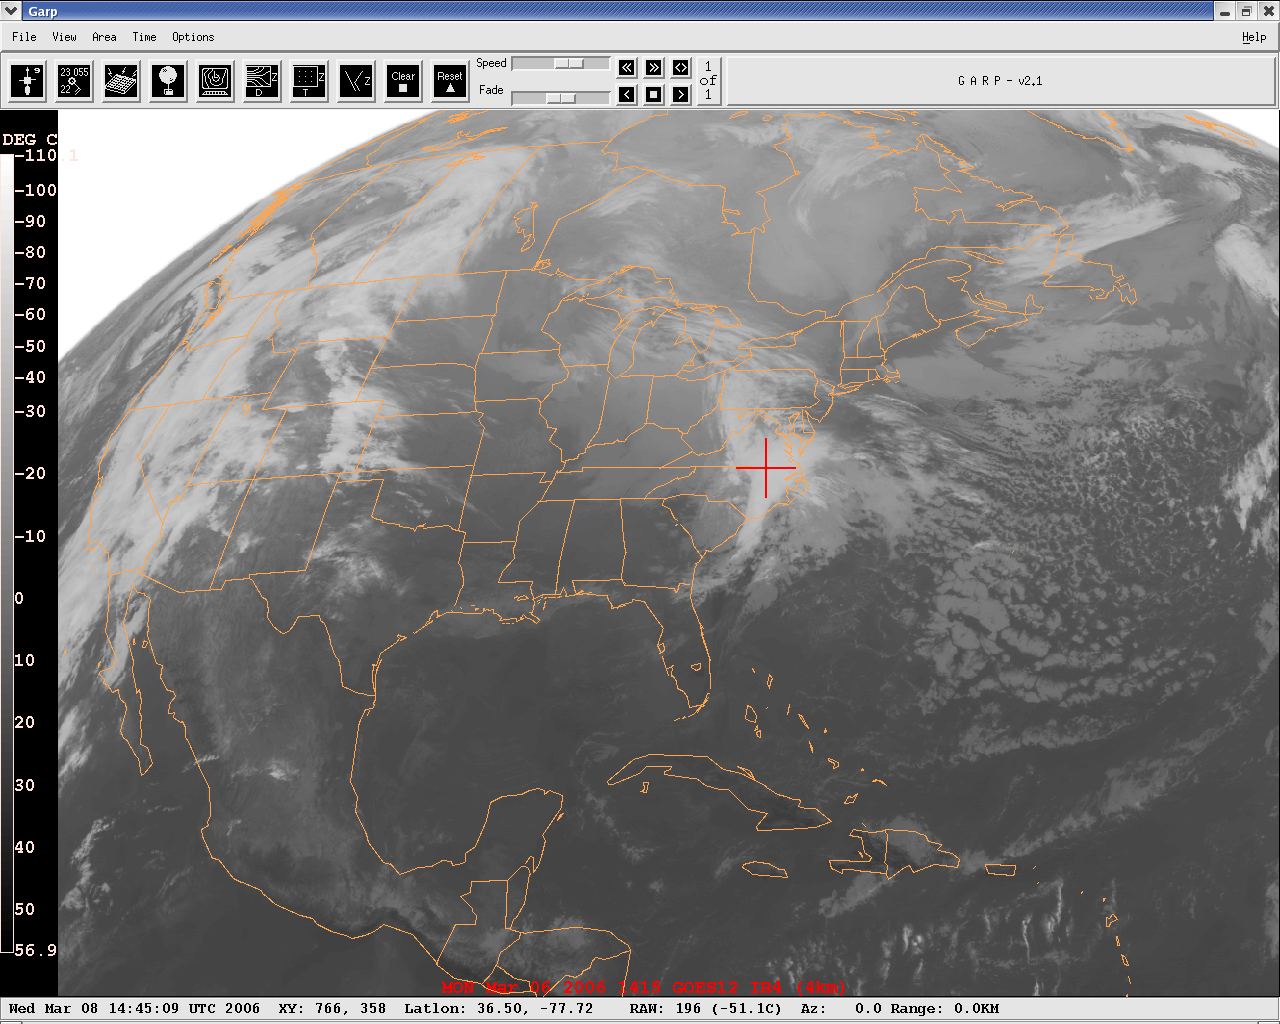
8. Brightness temperature and brightness counts at the cursor location are registered in the information bar at the bottom of the GARP window. They can be found just to the right of the Latlon information in a string as from the image below: RAW: 196 (-51.1C) . This example shows 196 brightness counts and a brightness temperature of -51.1oC. Note that the image below was NOT resized first and is too big to be easily displayed or printed, but it includes ALL the information in the info bar.
Resizing the image before saving will leave you with a satellite image of managable size; note that I have kept it large enough to retain the brightness temperature info:
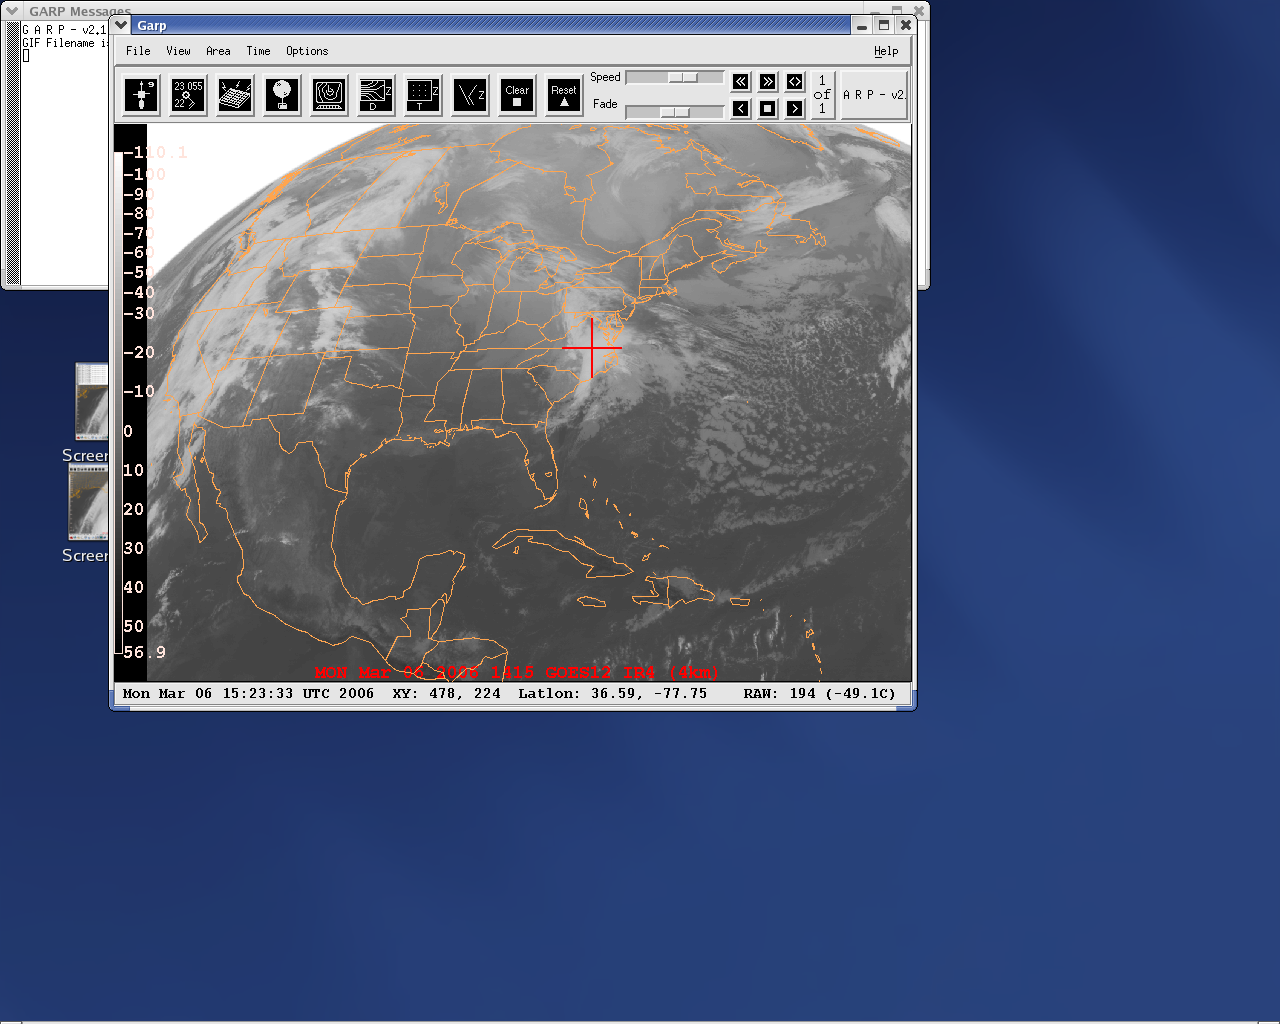
9. To save your image with brightness temperature and location marked:
a. move the cursor to your location of interest then click to leave a red "+" and LEAVE THE CURSOR IN PLACE to register the exact brightness temperature at that location--moving the cursor changes the brightness temperature!
b. press the Print Screen key on your keyboard
c. a Save Screenshot window opens that saves to your Desktop directory by default--you can change the directory to your home directory or change the filename manually in the Save Screenshot window.
d. the file is saved as a png (portable network graphics) file.
e. to change the file type, open a terminal window by right-clicking on the blue background then click on New Terminal. This "terminal" defaults to your home directory; you can list those files by typing "ls" or "ls -la". If you saved the screenshopt to your home directory, then you can type the command: "convert filename.png filename.jpg" then press "enter" to convert to a jpeg. If you would prefer a gif, just type the target filename as filename.gif . You can also convert to .pdf or .bmp (bitmap). Get rid of the terminal window by typing "exit" then pressing "enter."
[10. Note: If you want to leave a red plus on the image and freeze the brightness temperature in the info bar, move the cursor to your chosen cloud location and left click. Leave the cursor at that position to register the exact brightness temperature there, then press the F10 key. This will freeze the numbers on the information bar so that you can now move the cursor off the image. Clicking anywhere will restart the information bar again, changing the brightness temperatures according to the cursor position. Unfortunately this command interferes with the Print Screen key so you cannot use this procedure prior to saving your image via Print Screen.
The normal method for saving images in GARP is the following, --but it does not save the info bar or the red "+", so it is not appropriate for Question # 3:
a. Click on File (upper left corner of GARP window).
b. Click on Save.
c. Click in the Filename box.
d. Type in a filename -----.gif (if saving multiple files it will use your filename and append numbers in your image order and automatically append the .gif extension).
The files are automatically stored in your Linux home directory.]
11. To transfer files to your ERAU Windows account, the simplest way is to email them to yourself:
a. Open "Ernie" in a browser by clicking on the "world with a mouse" icon:
b. go to Ernie and log in.
c. Click on the Online Services tab.
d. Under ERAU Tools click on "Email (OWA)"
e. Open a new message, address it to yourself, then use the "paper clip" to attach the file to your email to send it to yourself.
12. Once you have transferred the image to your Windows computer, you can manipulate it using the Windows Paint program (you probably should edit out all the parts of the image that show screen items other than just the GARP window):
a. Click on "Start"
b. click on "programs"
c. click on "accessories"
d. click on "Paint"
or right click on the filename and use "open with" then select "paint."
13. You can also edit the image directly in Linux by going to the "Applications" drop down window, selecting "Graphics", then select "KolourPaint".